Category Archives: Lunch/Dinner

Back in the saddle

Image

Ok, the first step is admitting you have a problem. I haven’t posted to this blog in…a while. It started off innocently enough – I was still cooking, but just didn’t have time to post and also had a brief lapse without a Photoshop license. Then that thing happened that always happens to me – where it’s so hard to come to terms with being behind that I ignore the issue and get way, way more behind. And then there’s no point in coming back from being way, way behind if you’re not going to have some perfectly epic comeback, right? Well, that doesn’t exist, so more time passes. This phenomenon is how I managed to not pay for a physical therapy appointment for a year and also part of my tortured relationship with guitar playing. Anyway, another confession I’ve avoided is that I get 3 meals a day at work. So, yeah. I’m not one of the people anymore. I’m a weekend cook. There, I said it.

Anyway, coming to terms with all this, I’m back. And I have lots of cooking to write about. Here’s one I’ve been meaning to do for a while. I actually made it while feeding a recently wisdom tooth-less boyfriend. It’s healthy, and filling, and yes, easy to chew if you’ve recently been through a dental procedure, but grownup enough for someone who hasn’t. If you live in San Francisco, soup is still a perfectly appropriate thing to crave in late March. No shaved asparagus salad yet! This one is actually very springy, with wilted spinach, bright green peas, a squeeze of lime, and fresh cilantro. It’s got a little curry to keep things interesting, but it stays squarely in the background and lets the veggies take center stage.

Friends, I challenge you to face that thing that you’ve been meaning to do. Here’s to being back in action!

Sweet Potato Soup
Adapted from loveandlemons.com

  • 2 tablespoons coconut oil
  • 1 onion, chopped
  • 2 cloves garlic, chopped
  • 1 tablespoon curry powder
  • 2 medium sweet potatoes, cubed
  • 1/2 cup peas (frozen is fine – is anyone not going to do frozen? no.)
  • 1 can lite coconut milk (2 cups)
  • 2-4 cups veggie broth
  • a pinch of brown sugar
  • squeeze of one juicy lime
  • a few handfuls of spinach
  • salt
  • handful of chopped cilantro, for garnish

– In a large pot, heat coconut oil. Add onion and some salt salt. Cook, stirring, until onions become soft, about 5 minutes
– Add curry powder and garlic and cook for another 30 seconds while stirring.
– Add a squeeze of lime, coconut milk, veggie broth, chopped sweet potatoes, brown sugar and a little more salt. Turn heat down and simmer, covered, until the sweet potatoes are soft (20-30 minutes).
– At the end, stir in the peas and spinach and cook for another minute or two.
– Top with cilantro and serve.


The Stuffed Squash Project

Title_Image

Before my roommate took off on a 4-month Southeast Asian adventure, we were in our San Francisco apartment on a typical lazy Sunday. With no particular plans other than avoiding a rainy San Francisco day and the gnawing feeling that we needed to clean, we decided to make the most by being as domestic as we could, and incorporating as much pumpkin into the day as humanly possible. This left us with a clean apartment and a lot of food to write about. It became the day of our second annual Stuffed Squash Project. This is where we decide to get fancy and with no recipe in particular, hollow out a squash of some sort, and stuff it with something delicious. For those of you who watch Portlandia, stuffing anything into a squash is the “put a bird on it” of San Francisco. It’s pretty much a guaranteed crowd-pleaser, but sometimes it can end up flavorless or tiring. I have to say, our first annual attempt ended up this way. We had some mushy quinoa with sparce toppings, and it was a noble, but anticlimactic end result. Most hollowed out squashes are pretty big, so you risk ending up with mostly dry, flavorless grains. This is no good. You need to stay entertained for the full squash. The goal is to have a completely satisfying meal in one edible bowl.

20131216-121942.jpg

20131216-122011.jpg

So instead of going with a recipe, we decided to pick what we liked. We bought some acorn squash, and a handful of other yummy things – a wild rice medley, sautéed mushrooms and onions, kale, pecans, parsley, and feta cheese. This is my favorite combo I’ve had yet. The wild rice holds up well and keeps from getting mushy. Browning the mushrooms beforehand gives them a rich flavor and color. The kale adds a little heft and makes you feel healthy. The crunch of the pecans and plenty of salty feta keeps things interesting the whole way through.

20131216-122637.jpg

I recommend combining this with a hefty dark beer, the heat turned up, and an easy desert baking in the oven – we made pumpkin brownies from a Trader Joe’s mix (hey, not everything is a blog post). Happy holidays!

Ivy Street Stuffed Acorn Squash
1 cup of a wild or brown rice medley , cooked (Trader Joe’s has good ones)
1 bunch of shredded lacinato kale
1 package of button mushrooms
1 white onion, chopped
spices: thyme, salt and pepper, and anything else you want to add 1/2 a cup of pecans
container of crumbled feta cheese
1 bunch of fresh parsley or chives

Halve the acorn squash, hollow out, pierce with a fork, and rub with olive oil. Salt on the inside. Heat the oven to about 400 degrees and roast the acorn squash until soft, about an hour to an hour and fifteen minutes. While the squash cooks, cook the rice according to package directions. In a pan, add olive oil and butter and brown the mushrooms, a la Julia Child (aka, don’t crowd the mushrooms or they don’t brown!). Transfer to a large bowl. Next, sautee onions in olive oil until soft and browning, about 10 minutes. Add in shredded kale and cook until soft, another 5-7 minutes. Add these to your bowl. Mix in chopped parsley, most of the pecans, most of the feta, and seasonings. Combine thoroughly, and then stuff the acorn squash as full as you can. Bake together for another 15 minutes. Remove and garnish with more pecans and feta.

Title_Image_TomatoSauce

I recently found myself in between jobs and with 12 whole days off of work. I hadn’t had that much time off since I was unemployed almost 4 years ago, and I was determined to do it right. Daily workouts, long walks, sun-tanning on the roof, busting out my juicer again – you get the idea. That kept me going until about the third day, before the darker forces set in – sleeping late, starting Breaking Bad, not putting on pants, watching more Breaking Bad. Finding myself with suddenly only a few precious days left of funemployment for who knows how long, I finally remembered that I really should have been cooking all week. I tried to think of the countless recipes I’ve looked at and thought “oh, that’s the kind of thing you do when your only job is to cook and blog about it.” Hmm…

That got me going. I headed down to the farmer’s market and, finding an impressive end-of-summer bounty, bought 3 pounds of early girl tomatoes . At $1 per pound, these guys are for nothing but a fresh pasta sauce, and this is exactly the time to do it. The tomatoes are extra delicious and on sale, and it’s about to be time for stick-to-your-ribs food.  So tomato sauce it was.  Well, two days later, because a) there was a lot more Breaking Bad to watch and it felt like a lot of work, and b) I tend to get really domestic when I’m nervous about something coming up. Whether it’s the need to creatively use up everything in the fridge before a big trip, or cleaning my room at the very moment things feel the most disorganized. That’s how I found myself spending all night making fresh pasta sauce on the eve of starting a new job where I knew I’d be fed three meals a day. But in addition to being some kind of cathartic exercise, this was a really delicious and fun challenge.

This sauce is truly from scratch – no place to cut corners here. You have to blanch the tomatoes, peel them, then cut and seed them. You have to cook down some finely diced onions, carrots, and celery, and then simmer it all for a good hour. Then you have to  run the whole thing through the immersion blender. But by going on this journey, you reach what Smitten Kitchen calls “tomato sauce nirvana.” The good thing about this recipe is that it’s effort-intensive in a blunt kind of way. It’s pretty hard to mess up. It’s also really basic, meant to be a base for any number of future recipes, from simple pasta to something baked and cheesy to eggs. Making extra and freezing it obviously a must.

20130922-215457.jpg

Fresh Tomato Sauce
Courtesy of Smitten Kitchen

3 pounds of early girl tomatoes (if you can find San Marzanos, I’m sure that will be amazing too)
A glug of red wine (yes, that’s the technical term)
1/4 cup olive oil
Small onion
2 to 3 small cloves of garlic
1/2 medium carrot
1/2 stalk of celery
1/2 teaspoon salt plus more to taste
A cup of chopped fresh basil

The tomatoes: Bring a pot of water to boil. Cut a small X at the bottom of each tomato. Blanche the tomatoes in the boiling water for 10 to 30 seconds, then either rinse under cold water or shock in an ice water bath. Now peel the tomatoes. Net,  halve your tomatoes, or quarter them if they’re on the bigger side. Squeeze the seeds out over a strainer over a bowl and reserve the juices. Coarsely chop the tomatoes.

The vegetables: Finally chop the carrots, onion, celery, and garlic.

The sauce: Heat your olive oil in a large pot over meduim. Cook your onions, carrots, celery and garlic, if you’re using them, for at least 10 minutes (I did this while I was finishing up with the tomatoes, and it was more like 20). Add your tomatoes, tomato juice, and wine, and bring to a simmer, lowering the heat to medium-low. Let simmer for at least 45 minutes. If the sauce still looks a little chunky, which mine did, throw the immersion blender in it or gently blend in batches. Add in your fresh basil once the heat is off and season with salt.

Bachelor Pasta

pasta pic

I’m not one to throw some red sauce on a pasta and call it an achievement. I usually see people doing that to a pasta and writing about, taking a picture of it, or charging $16 for it, and think “really, that’s it?” Maybe I’m not a pasta purist – although I had no problem living off of spaghetti pomodoro for a month in Italy. But outside of the Old World, where all tomato sauce usually starts in a jar, it leaves something to be desired.

Let me tell you right now, that’s not what this is. To start, it comes from whole canned San Marzano tomatoes, so  friends and neighbors, put your Bay Area tomato snobbery minds at ease. Second, this is Spaghetti All’Amatriciana, which means it’s really about slow cooked onions and pancetta. I had this in Rome and it’s never left my consciousness since. Lots of salty deep flavor from the pork, not to mention a hefty, hefty dose of red pepper, makes this surprising in addition to being no-brainer delicious.

photo (3)

I got this recipe out of some sort of Bachelors cookbook made by Esquire, which is easy enough as it is…then cut the time by about half. I found it long enough to develop those deep flavors, but I’m sure going the whole way with it is even more awesome. I also used regular bacon out of necessity (really Whole Foods? If you can’t find a market for pancetta in San Francisco, where can you?). I thought it would be a bigger deal than it was, but nice thick-cut smoky bacon does work quite well. The recipe actually calls for guanciale, but unless you’re a bachelor trying to impress someone you probably don’t have to worry about pulling out all the stops.

Spaghetti All’Amatriciana – Bachelor’s Style

6 0z pancetta or good bacon
1 large onion
2 1/2 tbsp minced garlic
1/2 tsp red pepper flakes
two 28 oz cans of San Marzano tomato puree (or buy whole tamatoes and chop or puree)
1 lb spaghetti

Heat a skim of oil (about 2 tbsp) in a large pot over medium heat. Add pancetta and cook, stirring frequently, until the fat begins to render and meat is no longer pink, about three minutes.

Add onion and stir, coating onions with the rendered fat. Season with salt and pepper and cook, stirring occasionally, until the onions are soft and golden, about ten minutes.

Add the garlic and red pepper flakes and cook, stirring occasionally, until the mixture is aromatic, about ten minutes more.

Add the tomato puree, season with salt and pepper, and bring to a boil. Lower the heat and gently simmer the sauce, stirring occasionally, until it reduces and thickens slightly, the flavors blend, and the fat floats to the surface, about 40 minutes (or as long as you can stand it before it just looks too good and you’re just too hungry).

In a large pot of salted boiling water, cook the spaghetti until al dente. Drain but don’t rinse, return spaghetti to hot pot, and toss with the sauce.

New Year, New Recipes

Title_Image_1

Call it bandwagon health, but when the new year comes, I do like to challenge myself to a month of (semi) healthy eating. It’s not because a new year brings promise of being a different person, or losing x number of pounds – it’s because, for one, the holidays are an unhealthy time from which you do want to recover, and for 2, the healthy recipes in cooking magazines can be seriously great. Magazine after magazine of delicious new and different healthy recipes leave me inspired and with a Pinterest board of ideas that can last all year. Last year, I found a month-long cleanse recipe issue of Whole Living and challenged myself to make each recipe in it (although I was allowed to eat other food on the side – you can’t live off of beet soup and smoothies). But by far, the Bon Appetit Food Lover’s Cleanse is the favorite that I look forward to with each new year.

In this year’s issue I found a recipe for white bean chili with root vegetables, and I was instantly on board. For one, it’s been chilly enough in San Francisco that I’ll try anything with soup, and for two – chili. This one has a ton of flavor for a veggie chili, mostly coming from massive amounts of ancho powder. While my ambitions to use dry cannellini didn’t exactly pan out (you have to remember to soak them the night before!), a mix of canned black and kidney beans was a perfectly delicious substitute. The chili has a ton of seasoning, the root vegetables blend in really well, and when you top it with some sliced avocado it’s perfection. This is a perfect example of how flavorful those healthy new year recipes can be!

White Bean Chili with Winter Vegetables
From Bon Appetit

  • 1 tablespoon olive oil
  • 2 leeks, white and 1″ of pale-green part, diced
  • 4 garlic cloves, finely chopped
  • 2 large carrots, peeled, cut into 1/4″ cubes
  • 2 large or 3 medium parsnips, peeled, halved lengthwise if large (remove woody center, if needed), cut into 1/4″ cubes
  • 1–1 1/2 tablespoons ground ancho chiles
  • 1 teaspoon ground cumin
  • 1/2 teaspoon dried oregano (I used Mexican oregano)
  • 2 teaspoons kosher salt plus more for seasoning
  • 3 cups of cannellini beans (or two cans of whatever beans you have on hand)
  • Cilantro (optional)
  • 1 ripe avocado, peeled, chopped

Heat oil in a large pot over medium-low heat. Add leeks, garlic, and 2 Tbsp. water. Cook until leeks are softened, about 5 minutes. Add carrots and parsnips; stir to coat. Cook, stirring often, until just beginning to soften, about 2 minutes. Add ground chiles, cumin, oregano, and 2 tsp. salt. Stir until fragrant, about 1 minute. Fold in beans. Add 5 cups water and bring to a boil. Reduce heat and simmer to allow flavors to meld, about 30 minutes (if using soaked beans, cook until tender, which may take a few more minutes). Season with salt. Garnish with avocado and cilantro.

The Perfect Lunch

Title_Image_1After going deep into a take-out only phase during a 2-month GRE study fire drill, I’ve come back out into the world. Which means I’m ready to do things like see people, clean my room, sleep…and start making lunch again. I needed to ease my way back in, and was brainstorming some  basic salad or sandwich options when my fabulous co-author here sent me a recipe with the challenging subject line “The Perfect Lunch?” That name has a lot to live up to. For us nine-to-fivers The Perfect Lunch must be supremely easy to make. It must be easy to bring in, especially if you commute on the most crowded bus ever in San Francisco (me) and have had a traumatic bus experience involving an exploded tupperware of soup, where you had to let it spill into an upside down umbrella until you could get off (yep, me again). This lunch must be nutritious, cheap enough to beat its takeout competition, keep you full all day, and easily combat the “well maybe I’ll eat it tomorrow” feeling when your coworkers tell you they’re doing another trip to the Grilled Cheese Truck. The Perfect Lunch? Obviously, I was intrigued.

This recipe hits all the main points of a solid lunch – filling beans, starchy sweet potato, lots of kale, warm spices. All wrapped up in an easy to eat pita. The recipe calls for making your own whole wheat pita and actually baking the filling in – which sounds amazing, I just wasn’t ready for it. It also calls for lentils, but canned black beans sounded pretty great in this dish and they take all of 2 seconds to open. It was a great foray back into lunch-making in particular and domesticity in general, and I really did feel ok next to the grilled cheese.

Spiced bean, sweet potato, and kale pita pockets
Adapted from here

1 onion
1 bunch of dino (lacinato) kale
1 large sweet potato
1 can of black beans
salt/pepper
cumin
a pack of whole wheat pitas

Preheat your oven to 350, pierce your sweet potato, and bake for 45 minutes – 1 hour.

Slice the onion into slivers and sautee over medium-high heat in a pan with olive oil until it starts to turn brown, about 10 minutes. Add chopped dino kale, salt, pepper, and a dash of cumin and let cook, about another 8-10 minutes.  Add black beans to pan with another healthy dash of salt and pepper, and a few dashes of cumin. Peel your sweet potato and cut into half-inch chunks. Add the sweet potato to your pan. Toast pita and fill with your mixture.

Fueling up

Title_Image_1

Although I am prone to baking sweet sweet desserts, every so often I do make something savory (and that I actually consume instead of pawn off to coworkers and friends). I thought about bringing this dish to thanksgiving to moderate the carboload, but quickly reconsidered to avoid having to defend quinoa to my entire extended family. Japanese people take their grains very seriously.

photo (3)

This is a second-hand recipe from 101 Cookbooks, grandfathered from Mark Bittman’s How to Cook Everything Vegetarian. Bittman is more or less a prophet of the plant-based diet, his NTY column his prophecy. Heidi from 101 Cookbooks is also a veg goddess in her own right, and I’ve made many of her recipes to stellar reviews. Her SF-based blog is also an aesthetic inspiration, with great photography that really captures the misty and magical essence of her city.

The butternut squash quinoa bake you see before you is a deliciously hearty vegan recipe that I made entirely with ingredients from my CSA box! Whenever I am able to use 80% of my produce the first week it feels like a major feat… It’s the small things!

photo (5)It’s time to fuel your body well in these final weeks of the year! Your body will thank you after you’ve wrecked havoc on it with a champagne diet on NYE, which is a completely acceptable social diet when you’re used to spinach, quinoa and kale the rest of the year, right? RIGHT??

Mark Bittman’s Autumn Quinoa Bake
adapted from 101 Cookbooks

1/4 cup extra virgin olive oil, plus oil for the dish
3/4 cup quinoa (Bittman and Heidi both use Millet, but I had quinoa on hand)
1 medium butternut or other winter squash or 1 small pumpkin, peeled seeded and cut into 1-inch cubes (learn to appropriately cut a butternut squash here)
1 cup fresh cranberries
Salt and freshly ground pepper
1 tablespoon minced sage leaves
1 tablespoon minced thyme and/or rosemary
2 tablespoons maple syrup or honey
1 cup vegetable stock or water, warmed
1/4 cup pumpkin seeds or coarsely chopped hazelnuts

Preheat the oven to 375F and grease a 2-quart casserole, a large gratin dish, or a 9×13-inch baking dish with olive oil.

Put 2 tablespoons of the oil in a small skillet over medium-high heat. When hot, add the millet and cook, stirring frequently, until fragrant and golden, about 3 minutes. Spread in the bottom of the prepared baking dish.

Scatter the squash or pumpkin cubes and the cranberries on top of the quinoa. Sprinkle with salt and pepper and the sage and drizzle with syrup. Carefully pour the warmed water (or stock) over all. Cover tightly with foil and bake without disturbing, for 45 minutes. (Don’t forget to cover! I did the first time and needed to add a lot of water to make up for the dryness)

Carefully uncover and turn the oven to 400F. As discreetly as possible, sneak a taste and adjust the seasoning. If it looks too dry, add a spoonful or two of water or stock. Sprinkle the pumpkin seeds on top, and return the dish to the oven. Bake until the mixture bubbles and the top is browned, another 10 minutes or so. Serve piping hot or at room temperature (hs note: drizzled with the remaining olive oil if you like).

Homecoming

I went home to LA for my mom’s birthday and as usual, my Bay Area culinary tendencies went straight out the window. Being raised on Southern Cooking is a hard, hard thing to walk away from. And why would you? There is a place in the world for kale slaw and a place in the world for vegetables cooked into oblivion with bacon and butter. I live with one leg in both of these places and plan to keep it that way.

One of my favorite coming home stories involves the fact that every time I fly down, my mom’s mac and cheese is always sitting on the stove waiting for me that night. Without fail. One night I asked my mom why she always made this particular dish for me on my first night home, and she said, “Well, because you usually get in after dinner so I know you just want something light.” Mac and Cheese. Something light. Did I mention she’s from New Orleans?

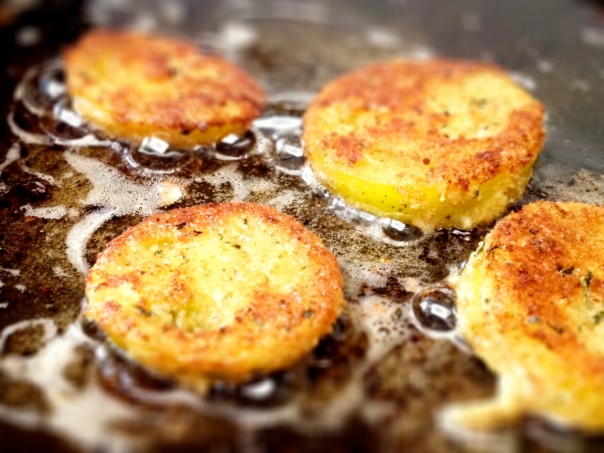
So it comes as no surprise that when our neighbors showed up with home-grown tomatoes, we found some unripe ones and decided to immediately fry them in fabulous ways. Fried Green Tomatoes. Coincidentally (or just completely not surprisingly) we had also been frying up some bacon, so we decided to fry the tomatoes in…wait for it… BACON GREASE. Yeah, I did.

These beautiful green babies are great on their own, or as the star of the best BLT you’ve ever had in your life. Best served with a glass of home-made sweet iced tea.

Fried Green Tomatoes
Sliced green (unripe) tomatoes
One beaten egg in a bowl
Cornmeal, or a mixture of cornmeal and breadcrumbs, in a bowl or shallow dish
All-purpose flour in another bowl or shallow dish
Salt and pepper
Some creole seasoning or season salt
Canola oil or bacon grease

Add salt, pepper, and seasonings to  taste to your breadcrumb bowl and mix, lining up next to your flour and egg bowls. Dredge tomatoes lightly in your flour bowl, and then dip in the beaten egg until coated. Transfer to your breadcrumb mixture until thoroughly battered, and shake off excess crumbs. Tip: Dip into the dry ingredients with one hand and the wet ingredients with the other – this keeps things a lot less messy!

Heat oil in a pan until nice and hot. Place tomatoes in pan until browned on one side, 2-3 minutes. Flip until the other side is also a delicious golden brown, and transfer onto a plate lined with paper towels or a paper bag.

Love

I’m not a hugger. I’m not good at giving compliments or telling friends I love you. I’m not always good at talking about important things and I sometimes forget birthdays. But I do know how to feed.

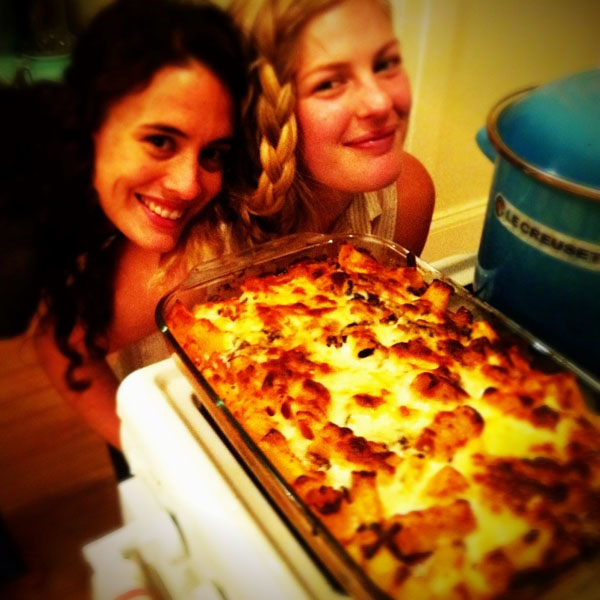
A couple weeks ago I had two of my best buds from middle school visit (you’ll know for me those aren’t even the longest friendships I have, but let’s not split hairs.) For three days my quiet, tiny San Francisco apartment was filled with giggles, shrieks, squeals, and everything else that makes you miss your old girlfriends. And I became a sixth grader. I bickered with them, shared a tiny little bed with them and didn’t sleep, woke up cranky and pouty and overly defensive of my questionable outfit choice. But  one thing was different – I cooked for them. Baked pasta. With cheese. And eggplant. And sausage. I call it Love in a Pan.

I’ve been making this dish for loved ones for a long time. It’s taken from Tyler’s Ultimate – that show where Tyler Florence picks a dish and figures out how to make the most ultimate version of it. This was from his baked pasta episode, and it really lives up to the name. It’s very serious and not for the faint-hearted, with lots of everything, especially cheese. It does takes some time sauteeing the eggplant, browning the sausage, making the pasta, and then baking it all until beautiful, golden, and bubbly. It’s done best when you’re hanging out with some people you can pass days or years with, especially over a bottle of red wine. You can save time a few places – half the time (okay, more than half) I throw in pre-made marinara sauce instead of starting with the canned San Marzanos. I also usually end up buying pre-cooked chicken sausage instead of the raw pork, so all you have to do is brown it. This stuff lasts for days and I never get sick of it. We ate it all weekend – for dinner, and then when ravenously hungry around 2am later that night.  Probably while laughing a lot.

Baked Rigatoni with Eggplant and Sausage
Adapted from Tyler Florence

  • Kosher Salt
  • Olive oil
  • 6 links italian sausage (pork or chicken), chopped
  • 1 large eggplant, cut into 1-inch pieces
  • 1 large onion, chopped (if making sauce)
  • 3 garlic cloves, chopped (if making sauce)
  • 1 large can (28 ounces) peeled whole tomatoes, preferably San Marzano (or a bottle of San Marzano tomato sauce)
  • A bunch of basil
  • 1 pound rigatoni
  • 1 pound fresh mozzarella
  • Freshly ground black pepper
  • 1 cup freshly grated good Parmesan cheese

Bring a large pot of salted water to a boil and cook pasta to while you start prepping everything else. Get out a big baking pan. Don’t overcook the pasta!

Heat a 2 count of olive oil in a large skillet over medium-high heat. Add the sausages and toss in the hot oil for 3 to 4 minutes, until nicely browned. Set aside in a large bowl.

Turn the heat down to medium. Add a generous 1/3 cup of oil to the skillet and get it hot. Add as many eggplant pieces as you can comfortably fit in a single layer and sprinkle well with salt. Cook, turning, for 7 to 8 minutes, until the eggplant browned on the outside and soft on the inside. Repeat as needed for the rest of the eggplant, and add to bowl.

If making sauce: Add another 2 count of oil to the skillet, then your onion and garlic, and cook for 3 to 4 minutes, until translucent. Dump the whole can of tomatoes and their juices into a bowl and crush the tomatoes with your hands to break them up; add that to the pan with the basil and cook it down until pulpy and relatively thick, about 15 minutes. If using pre-made sauce, skip this step!

Add the tomato sauce, rigatoni, half the mozzarella, and salt and pepper to the bowl and mix. Pour this into your baking sheet, cover with the other half of the mozzarella and dust with Parmesan cheese. Drizzle with a touch more olive oil and baked for half an hour or until deeply golden brown. Share with good people.

Picnics are Bomb

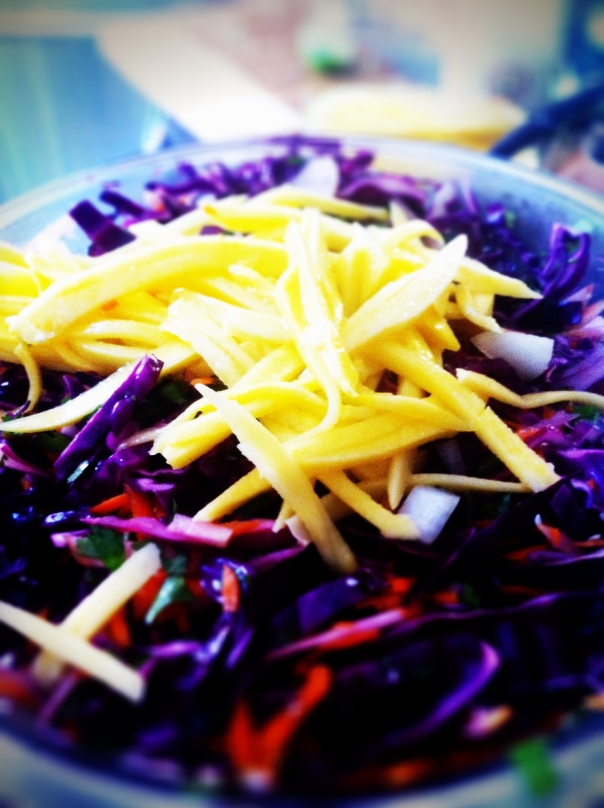
Collabo post! Finally in the same city for one weekend, we naturally had to embark on a meal mission. Finding ourselves wildly overwhelmed in the produce section of the monster Whole Foods on Lincoln, we decided to throw together an Asian/vegetarian taco themed picnic. Which, if you’ve succumbed to all the hipster foodie quackery floating around Los Angeles, isn’t a ridiculously uncommon theme these days. Add a side sesame slaw, sangria and some good people for a gorgeous Sunday afternoon!

Rainbow Peanut Slaw

1 whole red cabbage
1/2 mango (preferably only semi-ripe)
1 whole apple
1 packed cup cilantro
1 cup peanuts
1 shallot or thinly sliced red onion
3 grated carrots
One lime

Dressing:
2 parts toasted sesame oil
1 part rice wine vinegar
Juice of one lime
Salt and pepper

Combine cabbage, mango, apple, shallot, and carrots in a large bowl.  Combine oil, vinegar, lime juice, and salt and pepper and toss. Add peanuts and cilantro just before serving.

Shitake Mushroom & Lentil Tacos  with Miso Herb Sauce
Adapted from here

Miso herb sauce:
3 garlic cloves
2 Tbsp. white or yellow miso
1 Tbsp. honey
1 Tbsp. soy sauce
pinch of red pepper flakes
3 Tbsp. orange juice
1/4 cup rice vinegar
2 packed cups basil leaves
1 packed cup cilantro
3 Tbsp. toasted sesame oil

Shitake Mushroom & Lentils
1 1/2 Tbsp. extra virgin coconut oil, divided
half of a yellow onion, diced
6 oz. shitake mushrooms (halve any large ones)
3/4 cup cooked lentils (I used de puy)
2 tsp. apple cider vinegar
sea salt + pepper


For the sauce, pulse garlic cloves with the rice vinegar in a food processor to blend. Add herbs and drizzle in oil until desired consistency is met.

In a large pan, heat coconut oil and add onions until translucent. Add the mushrooms and a pinch of salt and just leave them to heat up and start to release moisture*. Once they have reduced in size, about 4 minutes, add the remaining coconut oil and saute to mix. Add the lentils and another pinch of salt and pepper and saute to warm through. Lastly, add the vinegar and stir to scrape up any brown bits in the pan.

Assemble tacos as desired!